Add a New Role Record
To add a new role, follow the steps below:
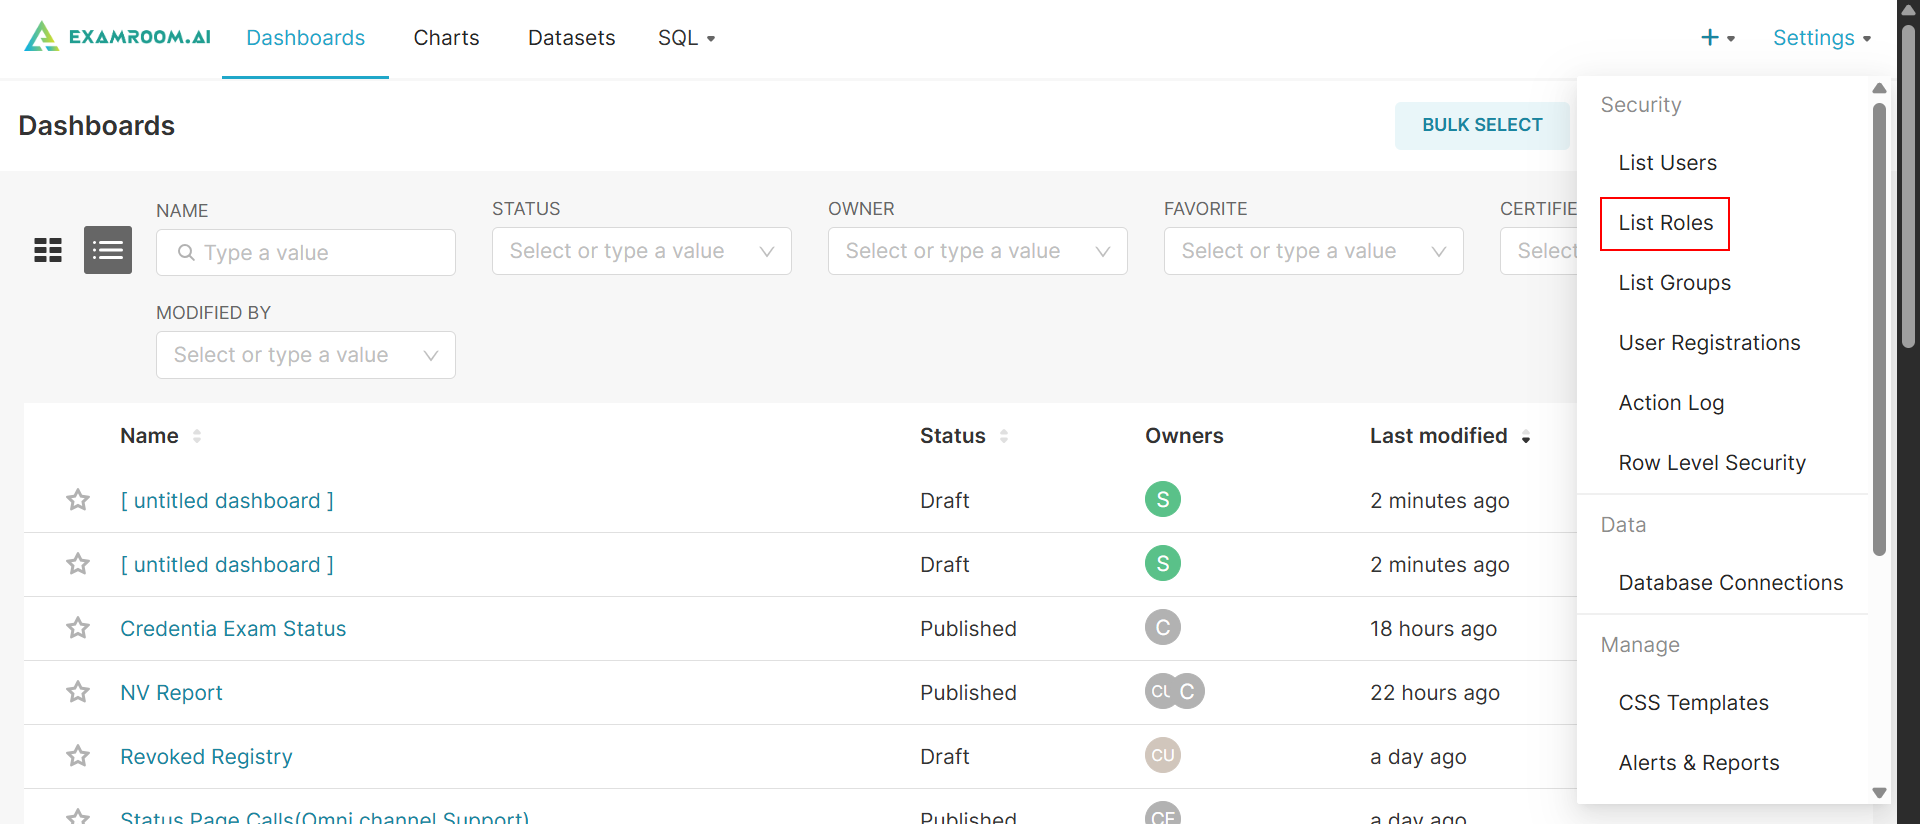
- On the ExamIQ, click Settings at top right corner of the screen and click List Roles to navigate to the List Roles section.
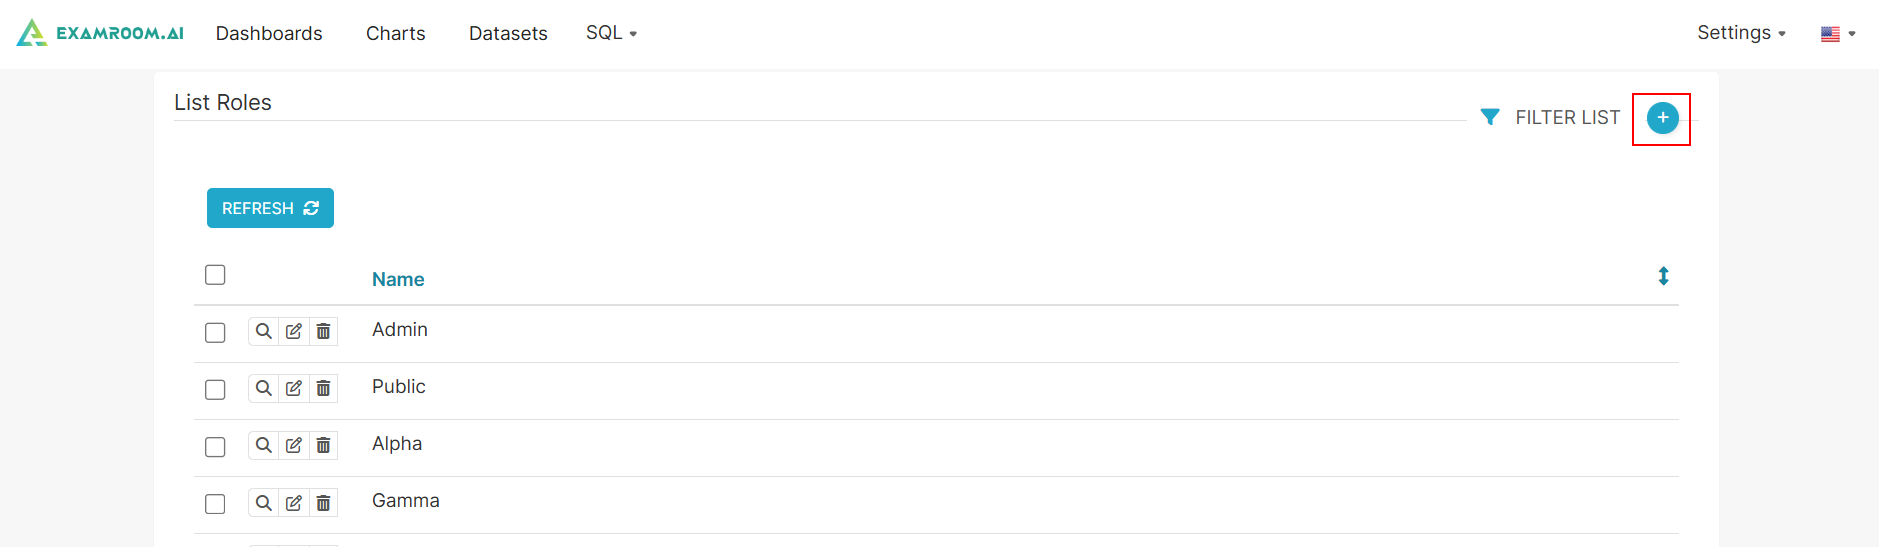
- In the List Roles section, click the Plus icon to add new Roles to the ExamIQ.
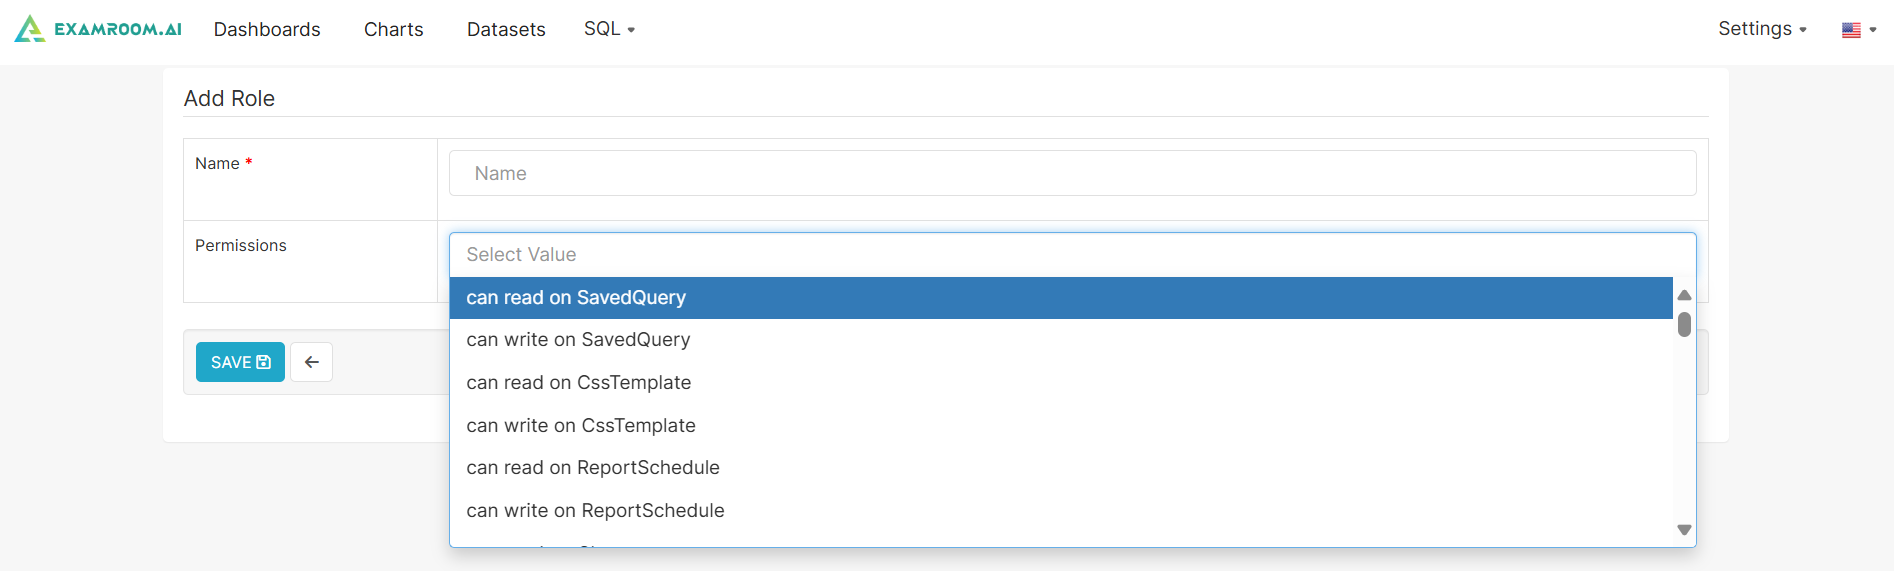
- Enter the Name of the role in the name field.
- Type and select the Permissions from the dropdown list to add permissions to the new role.
- Click the Save button to add the new role record. Otherwise, click the Back icon to go back to the previous page without saving.